Sunday, 16 December 2012

Storyboard & Animatic

 Whilst through the process of modeling my character, I had to come up with an idea on what I wanted to Animate it doing. This is also useful to do now, so I know how complex the rigging will need to be for my modeled character in order to achieve these movements. I came up with this storyboard:
 

After gathering opinions on my storyboarded idea, It was agreed that this would require too much time needed for this task. So I needed to simplify what my character would be doing in the animation.
 
 
This one is much easier than my last idea, however the movements needed ontop of the stump could be quite difficult to animate with my character rig. So I needed to simplify it a bit more.
 
This final storyboard, is simular to the last one, except that my character now leapfrog jumps ontop of the stump and stays in that position whilst he reaches for the mushroom and he then stands up. This will be easier to animate as his feet will remain in the same position as the body lifts.
 
Now that I had finally decided on what I wanted to happen within the animation, I then made an animatic from the final storyboard to get a better feel of the timescale throughout the movements:
 

Thursday, 13 December 2012

Rigging Practice


To learn how to rig & add weight to a character. I modelled a basic stick figured person to practice with.

 First thing I did after creating my model was use the joint tool, to create the bones. I started this with the root bone (bottom of spine) and worked my way around the body. Making sure there were joints in the areas of where an arm would bend etc. It's also important to name each joint appropriately so they're easier to find later on if needed.
 
 
Next I selected the Skin and Bones and used the bind smooth tool. This merges them together. I then placed the bones on a separate layer to the mesh in order to avoid selecting the wrong objects.
 
After that I had to add weight to parts of the body's vertices, this is important to do as it prevents overstretching of the mesh and controls exactly how much can move when animating.

 
In order to make the bones moveable, I added an inverse kinematic using the IK handle tool. In the spinal area I used IKSP solver, since the back doesnt need to fully rotate. And for areas like the limbs I used the IKRP solver, since these areas will need to be most felixble with bends and rotations.
 
Lastly, I added a controller which was made using Circle Nurbs. Once parented to the bones, these are able to control the set of bones each circle nurb was applied to, making it easier to animate rather than having to select each bone and rotate them.

Wednesday, 12 December 2012

What is a Modeller?


3D Modelling is the process of creating a mathematical representation of any Three dimensional object using software such as Maya, Cinema 4D & 3DS Max. Models can be created automatically using 3D scanning equipment or in most cases is done manually. This process is made up from using polygons to create an over all shape/object.

A Modeller is involved in the pre-production phase of the pipeline. Once a concept artists render has been approved, the modeller is then instructed to build the character/object in the digital 3D environment. Giving it depth and detail. Traditionally clay models were used as reference tools to give a glimpse of how the character should look in 3D but modern technology now allows us to sculpt these models and scan them straight into a completed 3D digital model. It is more efficient for studios to emply specially trained modelers to create things like characters entirely in a computer environment. This allows better flexibility and on the spot editing, rather than having to re-sculpt a figure and enables the modeler to accomplish texturing, painting and application of UV directly in the 3D software.

When modellers finish building a basic shape of the object/character, they then refine the figures to include fine details of skin textures, clothing and other parts. Most oftern, the model is worked on using multiple applications such as Mudbox to put these finer details in using a more sculpt-like interface. It's important that the modeller keeps an eye on the number of polygons used to ensure the model doesnt exceed the allotted memory capacity, so its wise to make use of good texturing rather than complete mesh for these fine details.

A 3D modeller needs to be methodical in how they approach their work, to make best use of any requirements and limitations. It would be an advantage if a modeller understands the anatomy structure of people and animals if they're specialised in character modelling, this would allow them to create models that are more true to life. A modeller may be involved in Animation, Video Game Development, Visual FX and Motion Graphics.

Tuesday, 11 December 2012

Modelling My Character


Now that I have fully designed to how I wanted my character to look like & produced a topology guide, aswell as a clay sculpture as reference... I was ready to begin the final model.
 
 
To begin, I opened up Maya and chopped up my turn around drawings to work from in a 3D space. I did this by using 2 Polygonal Planes and textured the angles, so they were to scale when the perspective views moved around the space. I then put these on another Layer and then set them to reference. Using this will guide the main shape of the character model throughout the modeling.
 
 
When I first began to model, I started from a cube as the head and added edge loops to increase the geometry and create the shape of the head. However, after taking a look at other people's work I realised this wasn't the best way of modelling a realistic head. So I watched a youtube video which explained to use Planes and extrude in a roundwards motion, starting from around the eyes. Since this method was more step by step and less polygons, it allowed me to position the vertexs in order to shape the face much easier.
 
 
I extruded polygons around the entire head, trying to keep the number even in order to avoid an untidy mesh made with more than 4 sided polygons. At times it became difficult to keep an even number of polygons. So when I needed to, I used the Merge vertex tool to merge the polygons together and even out the numbers properly. It was also important that I kept the number of polygons to a minimum in order to make the object easier to edit, load and animate all together, the smooth vertex tool makes this posible without sacraficing smoothness for low poly models. To make it easier in the modelling phase, I deleted the head mesh (& later on the body) on one side, so the model appeared sliced in half from a front perspective. This is a good thing to do as it allows you to focus on one side and later on mirror the other side automatically, based on the remaining mesh. This keeps things semetrical which is useful when creating an object such as a body, consisting of two arms, two legs etc.
 
 
To see the facial shape was turning out properly, I used the Special Duplicate tool to mirror the other side of the face. This was handy to use as it would mirror exactly what I did to the right side of the face whilst in preview, so I didn't have to keep de-selecting the object and checking the smoothing.


After finishing the head, I then added the hair by overlaying a plane, extruded around the back of the head... Trying to keep it as even in geometry as possible. I used the interactive split tool to go diagonally and across each polygon, so that I could then select the middle vertex on each polygon & pull outwards, creating the spikey hair.


I then modeled the body, trying to keep the body inshape with the drawings and went halfway up to the neck, so that I could join it with the head that I had already modeled. I found the Average Vertices tool very useful to smoothen both the body and head and give it more of a roundish appearance like a real person would have.
 
 
I decided to scale the body to be larger, as it appeared too small for the head. Then I merged the two together to complete the model. I was difficult merging the vertices from the neck to the head, as the geometry didn't completely match, so I was forced to even it out with some triangular polygons.


Now that I completed the modelling. It was time to UV map the model... To do this I had to first unwrap everything correctly so it could be layed flat on a 2D surface and textured over, using another software such as photoshop. To correctly texture a body, it's wise to break down the body parts to separate such as the head, arms, hands, legs and feet. I inserted UV edge cuts in parts of the model which wouldnt oftern be seen as it's impossible to completely hide a model seem.
 
 
During the UV mapping process, I was using a checkered pattern which allowed me to see how the texture was wrapping around the model. The aim was to keep the same size of checks wrapping round as even as possible, so it would be easier to detail with the final uv texture. After making the UV map nice and tidy, I exported it as an image and edited it in photoshop, giving it texture to the correct areas.
 
 
Finally after merging the body back together, I have completed the modelling stage of my character and it now awaits Rigging & Weighting, so I can begin to Animate.
 
Overall I'm very happy with what I've achieved in this model, the face is exactly how I wanted it to look in terms of facial cheek bones. The only let down was I didn't have time to add wrinkles to the forehead and I wasn't able to do too much with the texture. I planned to add different streaks of brown to his skin in order to resemble tree bark but I had alot of difficulty and not enough time to make the streaks flow across the body parts, since they were unwrapped separately. But I believe the character will still look appealing when used in the correct lighting within the animation.

Clay Sculpting

Alongside the Topology drawing I created before begining the animation. I also experimented with Polymer clay to sculpt a 7" physical version of how the 3D model should look. This will also be a useful tool to use as reference during the modelling process.
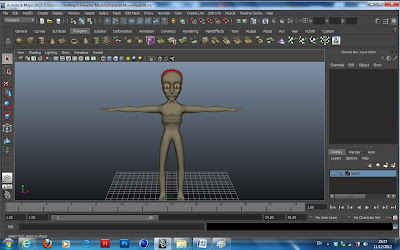
First Thing I did was create a wired Armature. This will keep the clay stable together and I will also have more control on moving the model whilst keeping most of the shaped clay undamaged.

 
I printed out the turn around images, so I could match the armature with the design & then I used a block of wood and threaded the two legs into, in order to keep it up right and make things easier whilst I was sculpting the clay model.

 
When I finished the main body, I made indentations for where the eyes would be placed and I baked the model in the oven at 130 Degrees for roughly 10 minutes. Sadly I burnt the arms slightly due to being a thinner piece of clay but this didn't matter as I was going to paint over the clay.


The clay was then solid and I was able to add the eyes. I did this and used Milliput to firmly fix the eyes into the head. I also used milliput to create the hair, using this allows me to add final details without having to bake the model again since Milliput hardens by itself after a few hours.


Finally, I painted the model using Acrylic paint. I'm somewhat satisfied with the end result. I would want the face to have more definition in the final model and the legs be more longer than the arms. This was something I wasn't able to reverse very easily, due to the armature.
 
Overall this has been good practice to preparing how I want my character to look like in a 3D space.

What is a Technical Director?

A Technical Director is a common job title in animation and visual FX companies. It depends on the individual company & what they would class a Technical Director. They can be involved with numerous things such as the modeling work in the early stages of production, the compositing and effects animation, lighting and shader.

The most common role for a Technical Director is usally within Lighting. Their responsiblity is to bring light and render 3D scenes.

Another type is the a Pipeline Technical Director, their role is to create a flowing architecture in which all of the animation departments can link together.

Any kind of Technical Director needs to be balanced in Artistic senses, able to adapt to most technologies and have a good attention to detail, aswell as able to solve problems. Some even may have programming skills, which is less common for Technical Directors to be involved with.

Types of Animation Rigs

I've looked at various types of rigs that Animators have produced for deforming objects. Each rig has its own way on affecting the behaviour of the object and how it moves.

Anim Curve 3D (Animationrigs.com)


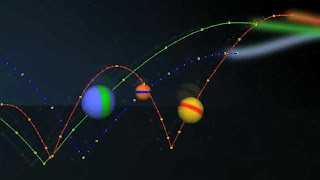
This type of rigging reminds me of the F-cure editor in Maya. It is controlled in the perspective view and is used for objects such as an bouncing ball. The longer the curves are, the slower the movement is. This rig is effective, since a keyframe can be moved at any time in this open space. It's a very basic form of rigging.

Posemonkey (Animationrigs.com)


This method of rigging, controls a character using fixed poses and the inbetweens are generated from theses set positions. Much like using a animation tween.
 
Posemaster (Animationrigs.com)
 
 
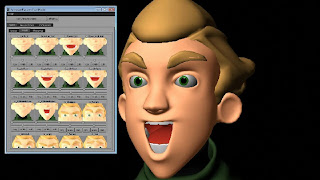
This rigging system allows you to change the facial expression and mouth flap to full animate a talking, expressionate face.

Mirroring (Animationrigs.com)


This rig doesn't deform the object, but makes the object follow the position of the controlling plane. This could be used for moving things around, such as a car.

What is a Rigger?


Rigging is a vital process to make a deforming object animated. The term rigging is used for when we create an armature and attach it to a 3D mesh, a good way to think of this would be like adding a skeleton to flesh. Because some models can be very high in geometry, it would be very difficult to manually move around the vertices ourselves, hence the use of rigging.
 
In Skeletal Animation, rigging is made up of bones. Each bone's position, scale and orientation can be transformed, alongside be parented to other bones to affect the overall pose, this is why we also add weight to the rigging. A bone would be associated with a group of vertexes on a mesh, which if was on a character would most likely represent a human like skeletal structure.

For the rig to work properly, the bones and joints must follow a logical hierarchy. The first joint placed onto a skeleton is called the root join and every subsequent joint connects to the root either directly or indirectly from another joint.
 
These are useful for the animator to focus on the movement at a large scale without having to manipulate each vertex and by having a bone structure, this allows the animator to refer to a natural anatomy movement. The only issue of animating in this way, if this is a lifelike character. It does not allow the mesh to create a realistic muscle and skin movement. This would have to be done using a separate muscle controller, attached to the bones.
 
Forward and Inverse kinematics are used to calculate the joint movements of a fully rigged character. A forward kinematics can only affect parts of the skeleton which fall below it on the joint hierarchy, where as with Inverse kinematics, the terminating joint is placed directly by the animator, whilst the joints above it are automatically interpolated by the software.
 
A Rigger gets involved with the Animation pipeline at the pre-production phase during the character design, since the character designs will determine the rig structure. The rigging begins once the character has been fully modeled. A character rigger would be responsible for building the virtual character skeletons and control rigs, setting deformable weighting, applying skins and creating facial shapes which are then later used by the animator. The Rigger will also write MEL scripts to streamline art production pipelines and develop new pipeline solutions to adapt to the changing needs of the animation team and to keep up the work flow.
 
Character rigging is a solitary task and requires a fair amount of group planning at the outset. Collaboration with the Animators is vital and having good communication and teamwork skills is needed for this role. A rig created needs to be as user friendly as possible in order to make the Animator's job easier and to save time.

3D Modelling Deformation

There are two types of models that are produced in 3D Modelling. Deformation & Non-deforming objects. This is depending on how the model is created, that's why it's important for appropriate planning before the modelling stage begins.


A deforming object is able to change its shape from being rigged. This could be for movements such as the arms and legs, if its a character or it would be the squash and stretch of a bouncy ball. The mesh of a deformable object is able to fold, bend and stretch. Providing the correct geometry is in place, it is able to do this without the model breaking and overlapping itself. This is the type of model that I'm creating for my animated character.


A non-deforming object is the complete opposite to a deforming model and is unable to change its shape. These objects would not have a rig and would be a solid mesh. This type of modelling would be used for in-animate objects such as a room, floor, non interactive type of object.