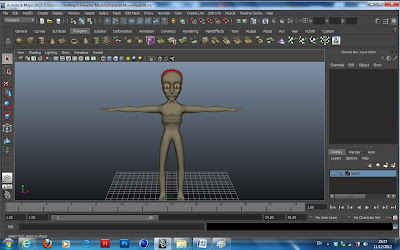
Now that I have fully designed to how I wanted my character to look like & produced a topology guide, aswell as a clay sculpture as reference... I was ready to begin the final model.
To begin, I opened up Maya and chopped up my turn around drawings to work from in a 3D space. I did this by using 2 Polygonal Planes and textured the angles, so they were to scale when the perspective views moved around the space. I then put these on another Layer and then set them to reference. Using this will guide the main shape of the character model throughout the modeling.
When I first began to model, I started from a cube as the head and added edge loops to increase the geometry and create the shape of the head. However, after taking a look at other people's work I realised this wasn't the best way of modelling a realistic head. So I watched a youtube video which explained to use Planes and extrude in a roundwards motion, starting from around the eyes. Since this method was more step by step and less polygons, it allowed me to position the vertexs in order to shape the face much easier.
I extruded polygons around the entire head, trying to keep the number even in order to avoid an untidy mesh made with more than 4 sided polygons. At times it became difficult to keep an even number of polygons. So when I needed to, I used the Merge vertex tool to merge the polygons together and even out the numbers properly. It was also important that I kept the number of polygons to a minimum in order to make the object easier to edit, load and animate all together, the smooth vertex tool makes this posible without sacraficing smoothness for low poly models. To make it easier in the modelling phase, I deleted the head mesh (& later on the body) on one side, so the model appeared sliced in half from a front perspective. This is a good thing to do as it allows you to focus on one side and later on mirror the other side automatically, based on the remaining mesh. This keeps things semetrical which is useful when creating an object such as a body, consisting of two arms, two legs etc.
To see the facial shape was turning out properly, I used the Special Duplicate tool to mirror the other side of the face. This was handy to use as it would mirror exactly what I did to the right side of the face whilst in preview, so I didn't have to keep de-selecting the object and checking the smoothing.
After finishing the head, I then added the hair by overlaying a plane, extruded around the back of the head... Trying to keep it as even in geometry as possible. I used the interactive split tool to go diagonally and across each polygon, so that I could then select the middle vertex on each polygon & pull outwards, creating the spikey hair.
I then modeled the body, trying to keep the body inshape with the drawings and went halfway up to the neck, so that I could join it with the head that I had already modeled. I found the Average Vertices tool very useful to smoothen both the body and head and give it more of a roundish appearance like a real person would have.
I decided to scale the body to be larger, as it appeared too small for the head. Then I merged the two together to complete the model. I was difficult merging the vertices from the neck to the head, as the geometry didn't completely match, so I was forced to even it out with some triangular polygons.
Now that I completed the modelling. It was time to UV map the model... To do this I had to first unwrap everything correctly so it could be layed flat on a 2D surface and textured over, using another software such as photoshop. To correctly texture a body, it's wise to break down the body parts to separate such as the head, arms, hands, legs and feet. I inserted UV edge cuts in parts of the model which wouldnt oftern be seen as it's impossible to completely hide a model seem.
During the UV mapping process, I was using a checkered pattern which allowed me to see how the texture was wrapping around the model. The aim was to keep the same size of checks wrapping round as even as possible, so it would be easier to detail with the final uv texture. After making the UV map nice and tidy, I exported it as an image and edited it in photoshop, giving it texture to the correct areas.
Finally after merging the body back together, I have completed the modelling stage of my character and it now awaits Rigging & Weighting, so I can begin to Animate.
Overall I'm very happy with what I've achieved in this model, the face is exactly how I wanted it to look in terms of facial cheek bones. The only let down was I didn't have time to add wrinkles to the forehead and I wasn't able to do too much with the texture. I planned to add different streaks of brown to his skin in order to resemble tree bark but I had alot of difficulty and not enough time to make the streaks flow across the body parts, since they were unwrapped separately. But I believe the character will still look appealing when used in the correct lighting within the animation.


No comments:
Post a Comment