Thursday 21 March 2013

Final Character Animation


This is my Completed Character Animation. This version is vastly improved from the previous version, with more animation displaying more interaction and emotion. Better lighting and shadowing. It took approximately 4 days to render this at 1080p, ultimately due to using final gathering which dragged out the render time unneccessarily.

Whilst i'm happy with what i've achieved. If I had time, I would have like to go back and fix the weighting around the ankles. Another problem which I noticed after watching this render a few times was that the body snaps during some movements. If I moved some of the positions more inwards, this will reduce the joints snapping in the last part of the movements. I would also like to increase the penumbra angle on some of the spot lights to reduce the roundness shape and blend the lighting together more so. Plus I would like to further experiment with the skin texture and coloured light beams.
 
After creating this i've become aware of areas where I need to develop my knowledge and skills. I would like to keep developing my use of lighting, texturing, weighting and making adjustments to optimise render times and quality.

I feel this character has successfully matched the criteria needed to convey personality, emotion, weight and interaction within the animation.

Creating The Final Animation

After learning how to control my character and knowing it was able to achieve the positions required. I began working on the final animation of my character.

I needed to model two props which would be used with the character. The tree stump and the mushroom. I quickly modelled and textured these in Maya and placed them in the scene to fit around the character. I also added a spotlight directly above to make the scene appear larger than it was and to keep the focus on the character when he appears.

 
In the beginning I only animated the falling section of the jump, because the lighting and camera angles used at the time wasn't going to show the first part.


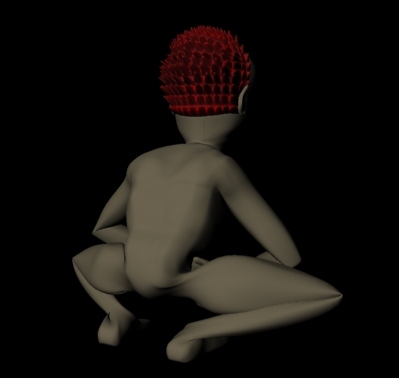
Animating the head was quite simple, I wanted to give my character a look of curiosity by having him looking around at his environment and then looking directly at the mushroom. I was worried when he would bend over to reach for the mushroom that his arms wouldn't stretch far enough, I did end up having to tweak his positioning in order to make it happen. I wanted the hand to be as close to as 90 degree angle as possible.


I used the set driven keys on the hand controller to close the fingers when the characters hand aligned with the mushroom and then animated them both to move upwards as I keyed the controllers to move back to the standing pose. To further give the character an emotion of curiosity, I gave him a slight tilt to the head near the end.

Lastly I animated the camera and spot light to move away from the scene to finish the animation.


After asking for some feedback, I learnt that I would be able to greatly improve the quality of this animation by improving the texture with a bump map, using better lighting, adding shadows. More movements and exaggeration was also needed to really give a better feel of this character. I decided to change the beginning of the scene where the character is visible much more sooner, where I could include a kind of walk cycle and show the entire jump.

I knew for the type of character I had created, an abnormal shuffle/gallop would match up to the persona. My immediate inspiration to learn how to make this kind of movement was to look at Gollum from The Lord of The Rings. Not having any of films, I used youtube to see what I could find.


Although Gollum is animated well, it was incredibly hard to use these videos as reference because the motion was too fast. I attempted to work out the movements regardless and I didn't achieve a result I was very happy with:


So, the only way to truly recreate this kind of movement was to record another reference video of myself re-enacting this style of movement:


This was greatly useful. I then broke the video up into screenshots and worked out the sequence from this. It was Keyframed in 16s:
 
 
Now that my character's jump is visible from start to finish, I wanted to make sure I really showed an emphasis on the leap. I looked at this motion guide as it shows the kind of exaggerated jump I wanted to achieve and key framed the main positions. It became a little tricky, adjusting how far forward my character would go and because he has long legs I had to leave enough height and distance for the contact of the stump. I wanted to give my character a child-like perspective with this jump.
 
 
Before when my character landed on the tree stump, he bent into the crouched position. But realistically, there would have been much more of an reaction. This was important to work on to demonstrate the weight and speed of the jump made. I made him hunch and flop his arms forward to achieve a more realistic land.
 
 
Also, because my character now steps off the tree stump to pick up the mushroom. I wanted to make sure I had good enough reference for the motion as it became confusing initially to imagine how my character would change from a crouched position to stepping down.
 
 
Another bit of new animation was where I made my character stand and stare at the mushroom and scratching himself to add to his look of curiosity. I've noticed that after adding this and the galloping cycle, my character has become more ape-like in his mannerisms.
 
One of my biggest learning curves I had in creating this animation was how to use lighting more efficiently. Previously, I had only one spotlight without shadows. This time round, I lit the scene using 3 spotlights with lower penumbra angle & higher drop offs... With Ray trace shadows switched on! I also added an area light in the middle which i used a light green colour to resemble light bouncing back from the grass and it also illuminated underneath my characters body more, with enough to shadowing.
 
Lastly to add light rays, to resemble light bursting through the scene like you would see in a forest. I used white, blue & green coloured rays with fog switched on at different levels. Initially I misjudged how easily they would be seen, so I had to tone them down and reduce the number of them since at times they would overlay each other and stand out even more so. It was difficult, especially when I was working on this using different monitors as the colour, brightness and contrast varied.


Finishing the animation, I rendered all 896 frames at 24fps as a Targa (.TGA) image sequence using the 'production' preset and having Ray tracing, Ambient Occlusion & Final Gathering switched on. When the render finished, I imported all the frames into Adobe After Effects and created a final .AVI file.

Animation Tests

After achieving these positions, I wanted to see how the model would react being animated. I did numerous tests on the movements required....
 
As you can see, my character is capable of these motions without the mesh becoming distorted. However I was required to learn how to use my rig controls effectively. The positionings at the time couldn't be controlled symetrically to achieve the poses I needed. This was due to joints not all being orientated in the same direction. So this was something I had to fix to make my controllers work better.


This is before I fixed the orientation of the leg joints and learnt how to correctly use the knee controllers.
 
 
I made a quick tester render using a point light upclose, to see how the animation would look renderedusing mental ray. As you can see, I clearly have to learn how to properly use lighting within a scene, as the light i've used has caused the scene to look flat and almost cel-shaded.

Testing Poses For Animation

Now that I had finished rigging and weighting my character. It was time to begin Animating, but before doing so I needed to learn the exact positions the characters limbs would be set to in order to achieve the correct movements. I spent some time recording video of myself acting out these movements for useful reference material.


In order to test the compatibility of my characters rig. I manipulated the controllers into the needed points to create the main poses which will be used to make the animation. This was a useful test as it allowed me to learn how the mesh would be affected by the movements. 


I’ve had issues with the knees on my character because as they bend, the legs rotate unevenly. I attempted to fix this by going into the attribute editor and changing the orientation of the bones so the values matched equally, I noticed this improved a great deal by doing this on the knee bone. Changing these settings I learnt that the rotation of the joints aren't equal and its not possible to change this unless I remove the skin which I spent a great deal of time in weighting. So I decided to leave this and try work with the knee controllers the best I can to make it less noticeable.

After fixing the orientation, the movement looked a lot more even. But I still had an issue where the legs would continue to twist as they bent. Finally after experimenting with the knee controllers I realised that the best way to make the knees bend without causing twisting was to move them forward on the Z axis Alone. I applied the value of 14. This kept the knees apart however there wasn't enough of an forward angle, the only way I could achieve this without causing the joints to rotate incorrectly was by setting the X axis to 14 & -14 when the bend motion was nearly complete. For example, from 1 – 12 the legs completely bent, but I didn't animate the X axis until frame 10.


When my character crouches down and picks up the mushroom, it appeared to work. Although the mesh does crease up, plus I'm slightly concerned how well it will crouch and lean forward when picking up the mushroom from the tree stump. I need to make sure I'm able to make the hand close around the mushroom at a 90 degree angle. The weighting worked well on the fingers, but the thumb nail slightly stretches with the point constraint so I will need to paint that park darker to stop it from moving.

The standing pose is in pretty much the same shape as the original meshes, except the controlling of arms. I want there to be a bend in the arm and the eyes to focus on the mushroom.

Ultimately these tests have proven that my character's mesh is capable of being manipulated to the poses and positions required. However I would like to continue improving the weight painting, to reduce the amount of creasing in the deformations. 

Rigging My Character

Before beginning to create my character rig, I looked at a couple made by others to grasp an idea of what makes a good rig and what would be suiting to my character's requirements.
My character will need to be flexible for crouching, shuffling across, being able to jump, turning his head and open and close his hands to pick up the mushroom.

The first rig I looked at was this robot testing rig. It was very easy to use and manipulate. It was capable of most the moves I needed for my character, although it wasn't able to crouch down very easily. The elbows and knees didn't have physical controllers, but in the channel box I was able to type in a value for how much i wanted the pole vectors to twist.


This Norman rig is more advanced than the previous, the controls are more in depth and have more of a custom user interface feel, alongside controls which manipulate the facial expressions and the eye's point of direction. However, this rig also controllers for the of the positioning elbows and knees making it more difficult to have them in the desired angle. I believe this Rig is  more than capable of achieving the movements my character would need to make, but on this occasion, I don't feel the rig for my animation needs to be as complicated and in depth as this. I will look to produce something more similar to the orange robot.

 
I started my character's rig by starting with a bone (tail) for the bottom of the spine and to link to the pelvis bones. I created joints for every area that would need to deform within the mesh. I wanted to make sure the spine would fully bend, so I used 3 joints within it, going up to the neck. The bones on the sides of the neck were to be used for the shoulders and these would link the arms to the body, plus these could be animated to roll along with the overall body movement. I made one joint for the head and with this attached to a controller, I could use this to rotate the head.


After creating all the joints, I inserted IK handlers from the top and end of the arms and legs, these would make the joints bend when being moved. I then used circle splines to be used as controllers for manipulating these joints. I parented these together and orientated the bones and used pole vectors for the elbows and knees. These create targets for the joints to bend in the direction of the spline controllers.

To make the hands close, I parented the finger joints to the controller and used set driven keys to make them rotate inwards on the Y axis when the controller is rotated, and the hand can open again when the controller is rotated back.


To make the mesh correctly move along with the bones, I needed to correct the weighting by weight painting. White was for freedom of movement and black wouldn't allow any movement. It was important to blend these together as the joints could be painted separately. I found it easier by painting white directly around the joints needed for deformation and with the rest flooded black, smoothing them to flow better together.  

Tuesday 19 March 2013

My Character UV Map


This is the UV Map that I created for my character model.
 
 
To add bit more of a depth to my character, I felt the need to find a bump map which would create a more skin like looking texture. I obtained this from: 'http://www.3dtexture.net/img-brown-skin-haut-3dmax-organic-480.htm'
 
Below is a screenshot with & without the bump map. You can see it can make a big difference in making an object look more real than without.


Looking back, I realise now that it would have been much more efficient to adjust the bump map to fit within the UV Map sections, since by placing this image straight over this caused the areas such as the hair and nails to also have the bump, which although not easily seen... shouldn't be there.