Before beginning to create my character rig, I looked at a couple made by others to grasp an idea of what makes a good rig and what would be suiting to my character's requirements.
My character will need to be flexible for crouching, shuffling across, being able to jump, turning his head and open and close his hands to pick up the mushroom.
The first rig I looked at was this robot testing rig. It was very easy to use and manipulate. It was capable of most the moves I needed for my character, although it wasn't able to crouch down very easily. The elbows and knees didn't have physical controllers, but in the channel box I was able to type in a value for how much i wanted the pole vectors to twist.


This Norman rig is more advanced than the previous, the controls are more in depth and have more of a custom user interface feel, alongside controls which manipulate the facial expressions and the eye's point of direction. However, this rig also controllers for the of the positioning elbows and knees making it more difficult to have them in the desired angle. I believe this Rig is more than capable of achieving the movements my character would need to make, but on this occasion, I don't feel the rig for my animation needs to be as complicated and in depth as this. I will look to produce something more similar to the orange robot.


I started my character's rig by starting with a bone (tail) for the bottom of the spine and to link to the pelvis bones. I created joints for every area that would need to deform within the mesh. I wanted to make sure the spine would fully bend, so I used 3 joints within it, going up to the neck. The bones on the sides of the neck were to be used for the shoulders and these would link the arms to the body, plus these could be animated to roll along with the overall body movement. I made one joint for the head and with this attached to a controller, I could use this to rotate the head.
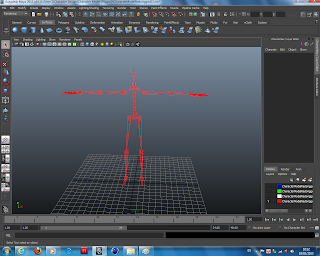
After creating all the joints, I inserted IK handlers from the top and end of the arms and legs, these would make the joints bend when being moved. I then used circle splines to be used as controllers for manipulating these joints. I parented these together and orientated the bones and used pole vectors for the elbows and knees. These create targets for the joints to bend in the direction of the spline controllers.
To make the hands close, I parented the finger joints to the controller and used set driven keys to make them rotate inwards on the Y axis when the controller is rotated, and the hand can open again when the controller is rotated back.
To make the hands close, I parented the finger joints to the controller and used set driven keys to make them rotate inwards on the Y axis when the controller is rotated, and the hand can open again when the controller is rotated back.


To make the mesh correctly move along with the bones, I needed to correct the weighting by weight painting. White was for freedom of movement and black wouldn't allow any movement. It was important to blend these together as the joints could be painted separately. I found it easier by painting white directly around the joints needed for deformation and with the rest flooded black, smoothing them to flow better together.


No comments:
Post a Comment